

Object Detection (Part 1): How to use the YOLOV3 network and Open VINO
Read the blog post here on Medium.
In this blog post you will learn how to implement the state-of-the-art YOLO (You Only Look Once) network to detect objects in images.
The YOLO network was first introduced in 2015 by (Redmon et al., 2015). You will also learn how to set up and use the Intel OpenVINO toolkit to optimize the YOLO model and improve the inference time of the model using the OpenVINO inference engine. And lastly, you will learn how to connect the feed of an IP camera using RSTP URLs to your YOLO network.
Part 1 of this series will deal with the download and setup of the YOLOV3 model, which has been pretrained on the COCO dataset as well as the download and setup of the Intel OpenVINO toolkit.
Part 1
The task of object detection implies that a neural network must be capable of not only classifying an object within an image, but also localizing the object. The YOLO network splits the image into a grid of regions and predicts a bounding box and probabilities for each region (Redmon & Farhadi, n.d.).
YOLOV3 Download
The source code for the YOLO model as well as the weights for the network trained on the COCO dataset are publicly available. For this post we’ll be using a keras version of the YOLO network found in the “yolov3_one_file_to_detect_them_all.py”. This file contains all the functions necessary to load and run the model from the command line*(had to change imports and np.nan to sys.maxsize). The saved weights of the network can be found here.
The “yolov3_one_file_to_detect_them_all.py” can be run from the command line with arguments for the input image and path to the weights file. The model then detects and labels the objects in the image and saves the output image in the working directory. To test whether the network was downloaded correctly we will be passing an image of a mouse and keyboard (image.jpg) to the “yolov3_one_file_to_detect_them_all.py” file with the following command line code:

The YOLO model will then be created, and the weights loaded. After detection an output image will be saved in your working directory. An example output image for the detection of a keyboard with a certainty of 97.4% is shown in Figure 1.

Using Your Web Camera for Object Detection:
It is, however, common that object detection be applied to the frames of a video feed and not the static images we used earlier. If you are using a PC with a webcam you can simply import the OpenCV module (cv2) and add the next few lines of code to the _main_() “yolov3_one_file_to_detect_them_all.py” to implement the object detection model on the feed of your webcam:
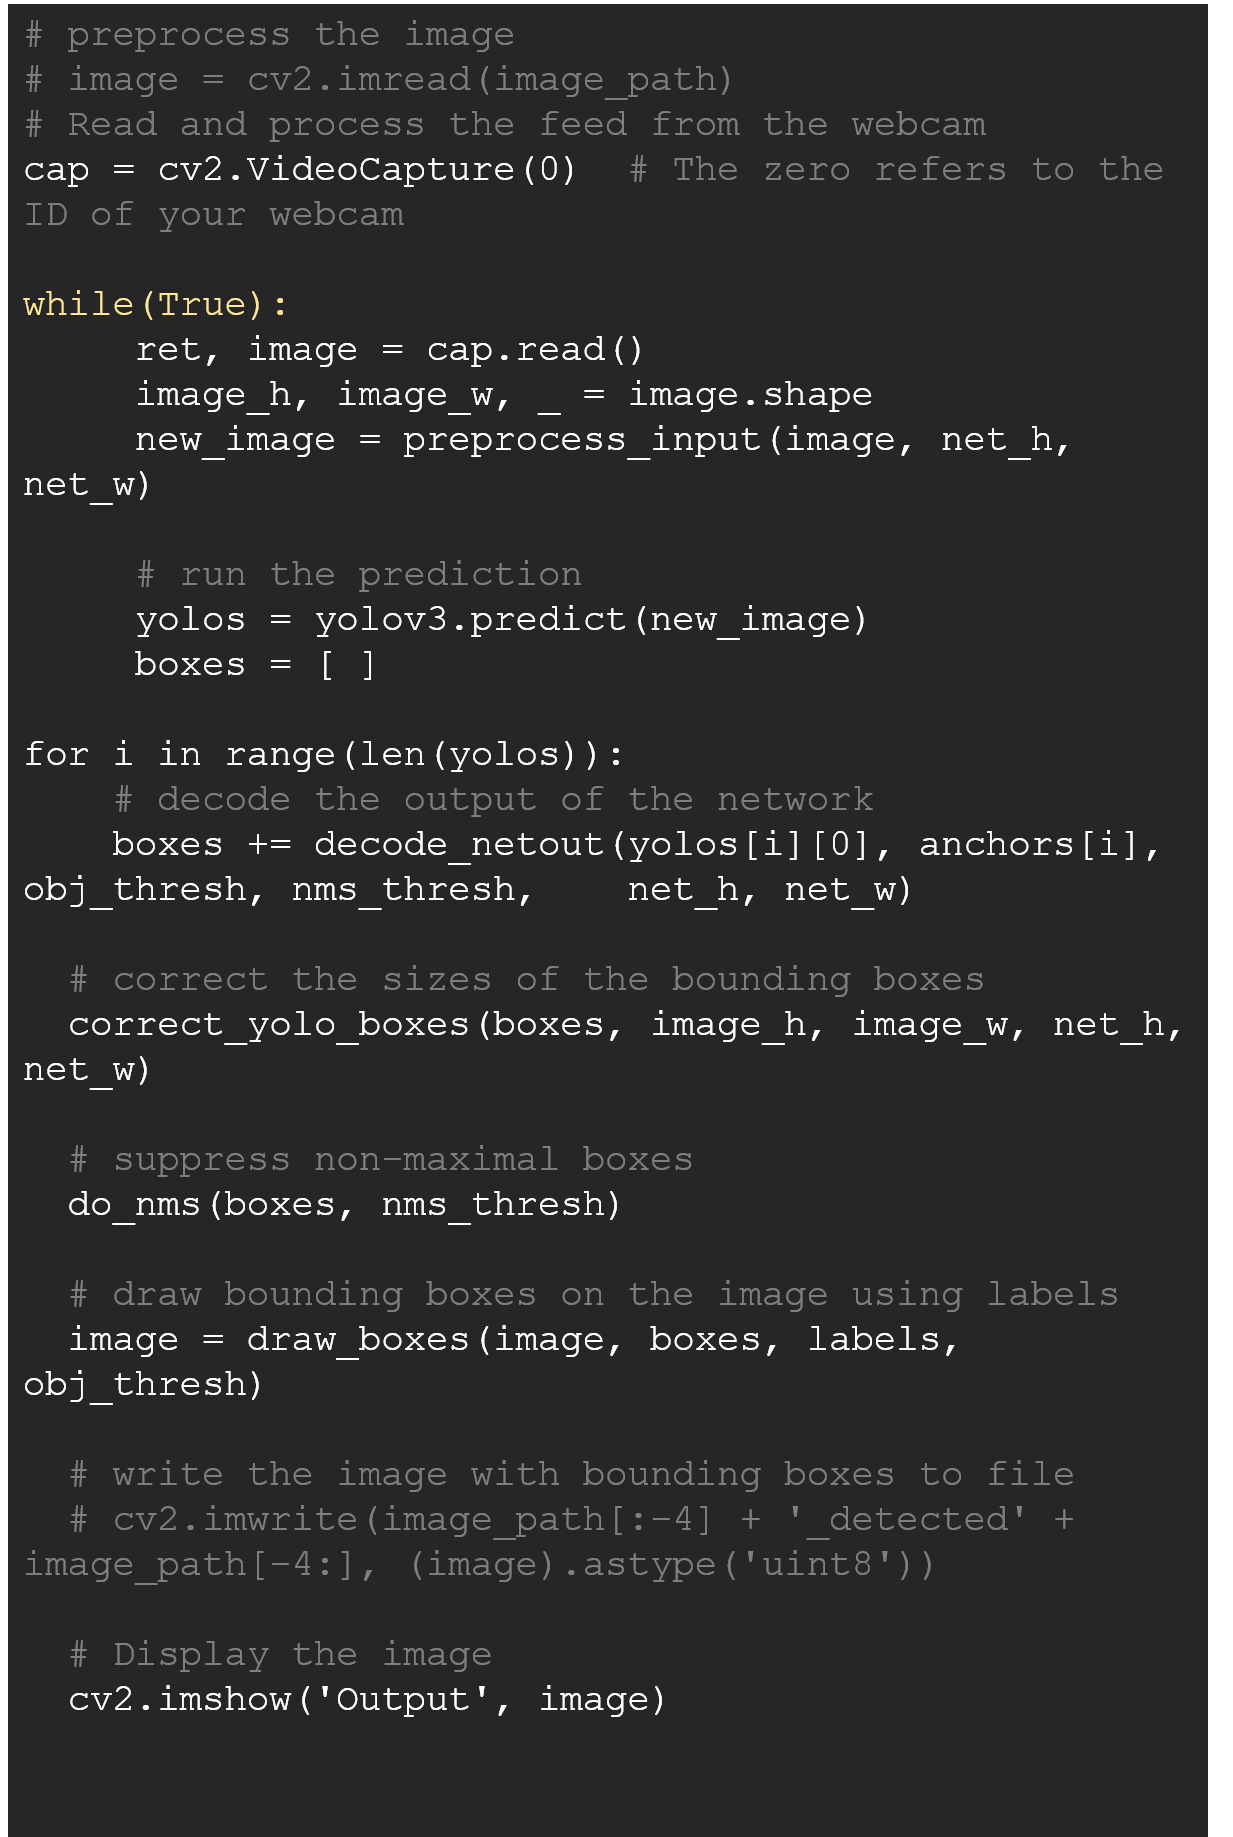
Now running the command line code provided earlier without the argument for the input image should load the model and show a window displaying your webcam feed with objects detected.
This concludes this part’s section on the implementation of the YOLOV3 model to detect objects using your computer’s webcam. The next section will deal with the install and setup of the OpenVINO toolkit. In Part 2 of this series, we will use the OpenVINO toolkit to optimise our YOLOV3 model, connect the input of the model to an IP camera, and run the OpenVINO inference engine to reduce the inference time of the model.
Intel OpenVINO Toolkit
The Intel distribution of the OpenVINO toolkit is a free to download set of Python and C++ scripts that are used to optimize, tune, and improve the inference of AI models. The toolkit also includes the Intel Open Model Zoo, which contains numerous pre-trained and pre-optimized models ready to be used.
A description of the download process and links from which the toolkit can be downloaded can be found here. It is important that you install the toolkit and its dependencies correctly.
After installation, we must first configure the environment. To do this, open the command prompt and activate the environment which you usually use to create your machine learning models (or the one you used to run the YOLOV3 model).
Then, navigate to the bin folder inside the installation directory of the OpenVINO toolkit and run the setupvars.bat file. This temporarily sets the environment variables for the toolkit and must be repeated every time you re-open the command prompt.
cd <Install Directory>\Intel\openvino_2021\bin\
setupvars.bat
Next, you will need to configure the Model Optimizer. The Model Optimizer is a set of Python scripts, which converts your pre-trained Caffe, TensorFlow, Apache MxNet, ONNX or Kaldi AI model to a so-called Intermediate Representation (IR). The IR is used by the OpenVINO inference engine. The IR contains two file types, namely a .xml file which describes the network topology, and a .bin file which contains the necessary weights and biases binary data.
Since the YOLO model was built using Keras, we will install the pre-requisites for the model optimizer for TensorFlow. To do this you must now navigate to the Model Optimizer directory and run the install_prerequisites.bat file for TensorFlow.
cd <Install Directory>\Intel\openvino_2021\deployment_tools\model_optimizer\install_prerequisites
Install_prerequisites_tf2.bat
You have now successfully installed the Intel OpenVINO toolkit.
In Part 2 we will first save the YOLOV3 model using the Keras module. Then we will use the OpenVINO model optimizer to convert the saved model to the IR, after which we will run the model using the OpenVINO inference engine. Part 2 will conclude with the implementation of the video stream of a HIKVision IP camera to the YOLOV3 model.


